Share

Venezuela’s Famous Tequeños: How to Make This Essential Appetizer

tequeño Venezuela

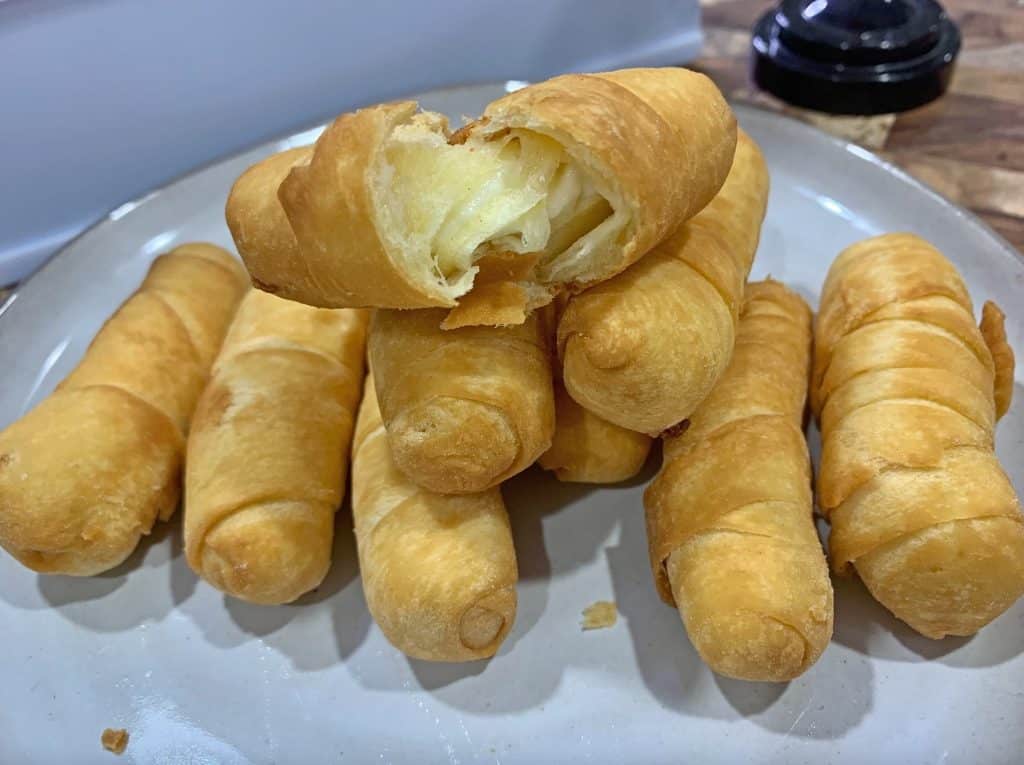
If there aren’t tequeños at a party in Venezuela, it’s not a party, says one of our favorite Venezuelan home cooks Liliana Hernández.

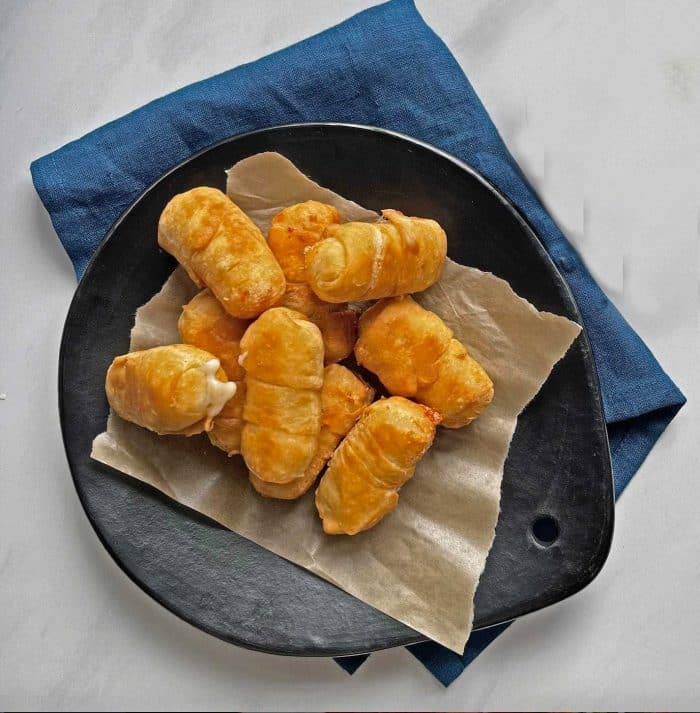
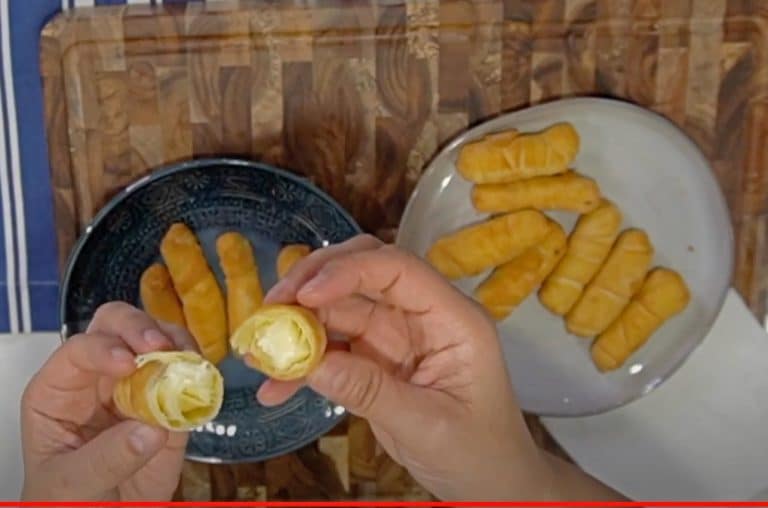
You are sure to be served this fried-cheese-and-dough traditional appetizer or pasapalos at every self-respecting gathering back home, she explains. What’s not to love? Gooey-melty good and totally addictive, tequeños are made with a local, soft, white cheese called queso fresco, and wrapped in overlapping layers of thin handmade dough. They are called tequeños because they are said to be first created in the city of Los Teques in northern Venezuela, Liliana explains.

As savory-delish as these starters are with a cocktail, Liliana says she has been known to serve tequeños for breakfast, mid-afternoon snacks and even dinner if she or her family craves them. Her hosting trick: She makes and freezes them by the several dozen, ever ready to take out of the freezer and fry if visitors drop by. They can be made with either cheese and chocolate inside, and both freeze beautifully.
tequeño Venezuela tequenos

The Taste of Home in Venezuela: Fried Queso & Dough

Like so many traditions we don’t fully appreciate until we leave home, Liliana didn’t start making her own tequeños a mano until after she had moved away, relocating with her family in 2000 to Mexico. “In Venezuela, you can buy trays of frozen tequeños in any grocery store, for almost nothing. But when I was living in Mexico, since they were not available anywhere, I started making them myself. And everyone loved them.”

Tequeños are supposed to be popped in your mouth piping-hot, with no salsa or condiments, their cheese pulling apart in your mouth with each velvety bite. But Liliana learned that when she made them in Mexico, her guests would invariably start looking around for something to dip them into. “They were used to guacamole, of course. They are used to putting salsa on everything. They don’t like to eat their food dry, as we do in Venezuela. They would look at me, as if asking, ’¿Y la salsa?,’” Liliana says.

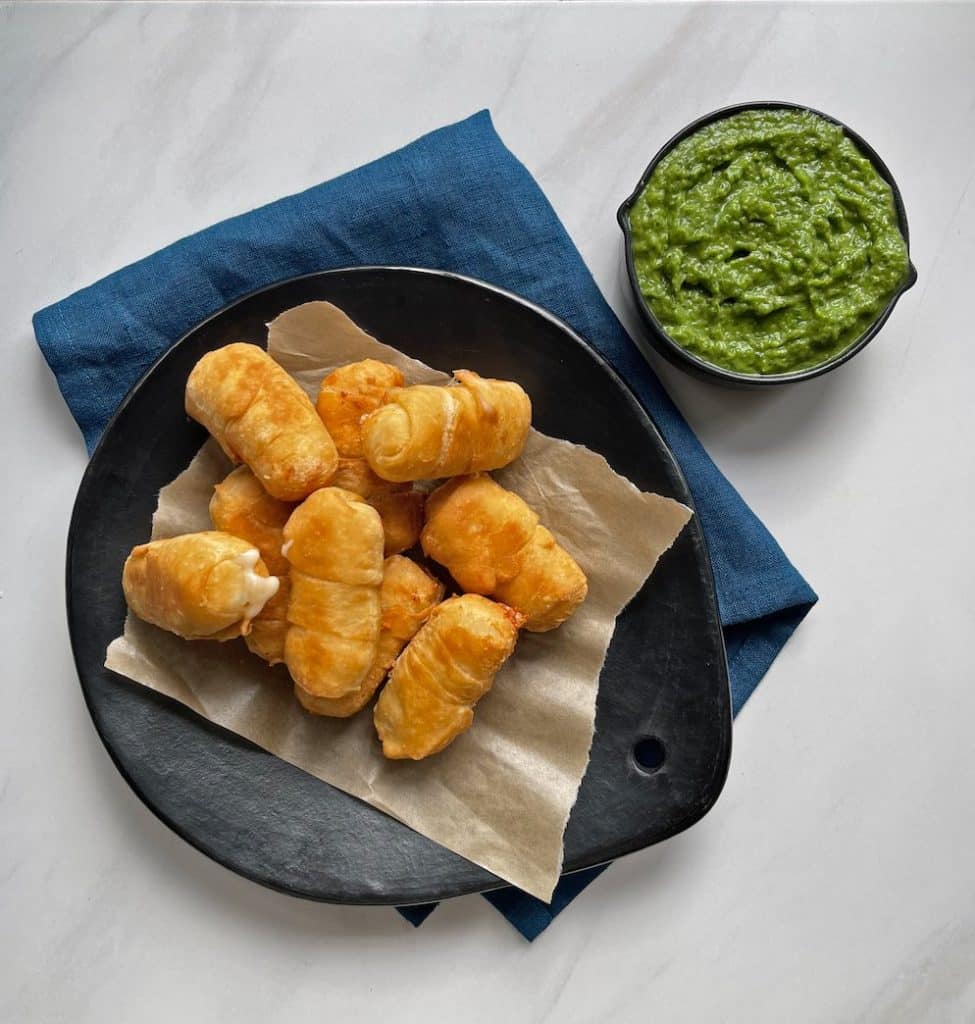
So she started setting out a bowl of guasacaca, the Venezuelan traditional salsa traditionally used as a condiment with grilled meat at parillas, alongside the platter of tequeños. This Wizard of Oz-bright-verde sauce is not usually served with them back home, she knows, but her new friends and neighbors in Mexico loved them paired, so Liliana is not opposed to serving it as a dip from time to time. But mostly she whips up big batches of guasacaca for parrilla grilling parties—like the good Venezuelan that she is.

Nothing is better than homemade, por supuesto. So, once Liliana started cooking tequeños from scratch, she never stopped. Her kids and husband beg her to make them regularly. And she does: at least once a month.

Yes, they take work — “it is trabajocito to make the dough, wrap them one by one, and fry all the tequeños — but you must make them,” Liliana says, promising: tequeños are one of the most delicious things you’ll ever eat. Ever.

“¡No puedes dejar de probarlos!”

For more of Liliana’s authentic Venezuelan family recipes, try her life-changing bienmesabe cakeasado negro main dish for celebrations, handmade toasted corn flour arepasreina pepiada and carne mechada arepa fillings, and her mother’s go-to ensalada rusa potato salad. All are 100% delicioso. And be sure to check out Liliana on her YouTube channel Mi Show de Cocina, where she is working her way through favorite Venezuelan dishes like these tequeños!

Ready to make tequeños, el mejor appetizer ever?
Venezuela’s Famous Tequeños: How to Make This Essential Appetizer

Recipe by Liliana Hernández
4.7 from 3 votes
Cuisine: Venezuelan
Servings

50

servings
Prep time

40

minutes
Cooking time

20

minutes

Ingredients

  • 3 cups all purpose flour

  • 3 Tbsp salt

  • 8 to 10 Tbsp unsalted butter, melted 30 seconds in the microwave

  • 2 eggs

  • 3/4 to 1 cup water, as needed

  • 2 Tbsp baking powder

  • 32 oz queso fresco (typically 4 packages, 8 oz each)

Directions

  • Make the Dough
  • In a large bowl, add the dry ingredients. Mix by hand or with a mixer.
  • Add the lightly beaten eggs, melted butter and half the water to start. Hand mix or blend on a low setting of the mixer.
  • Check the consistency. You want the dough to be solid and lightly moist. Add a little bit more water if necessary. When the mix is no longer sticking to the sides of the bowl, place the dough on your counter and lightly knead for about 1 minute. Pat the dough into a ball, place it in a bowl, and cover with a kitchen towel to let it rest for 20 minutes.
  • Slice the Cheese Into Sticks
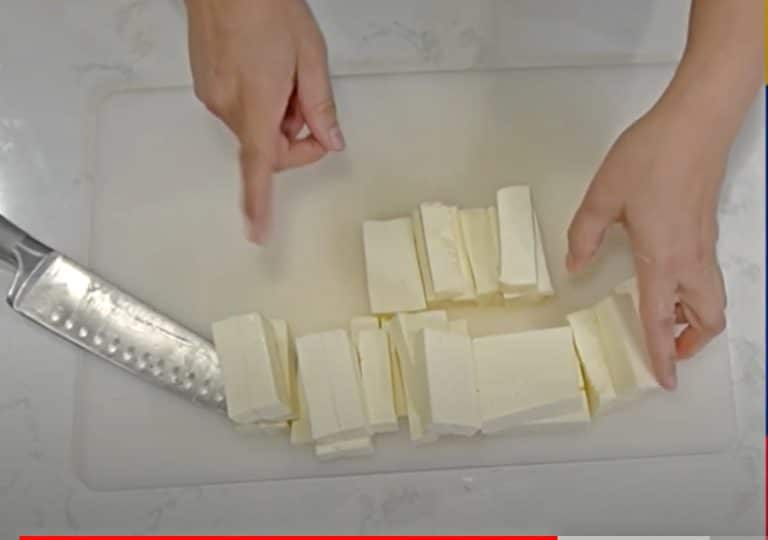
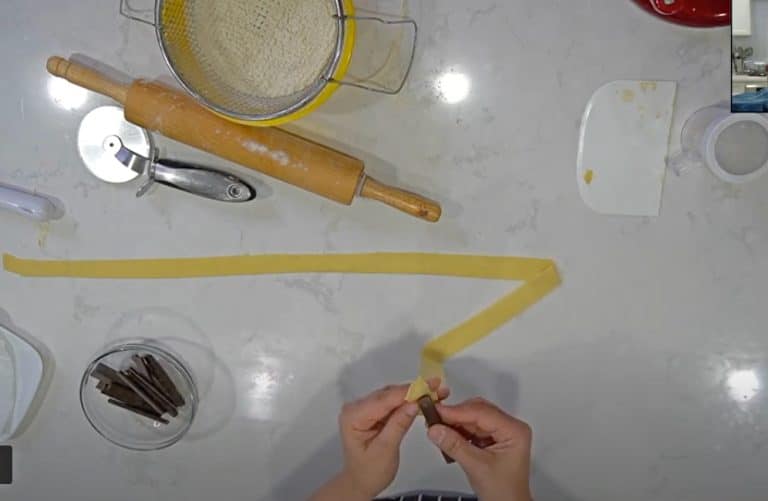
  • While the dough is resting, slice each cheese block into sticks about as wide and thick as your finger—1/2 by 2 inches long. Line up all the sticks of cheese on a plate.
  • Roll the Dough & Wrap the Cheese Sticks
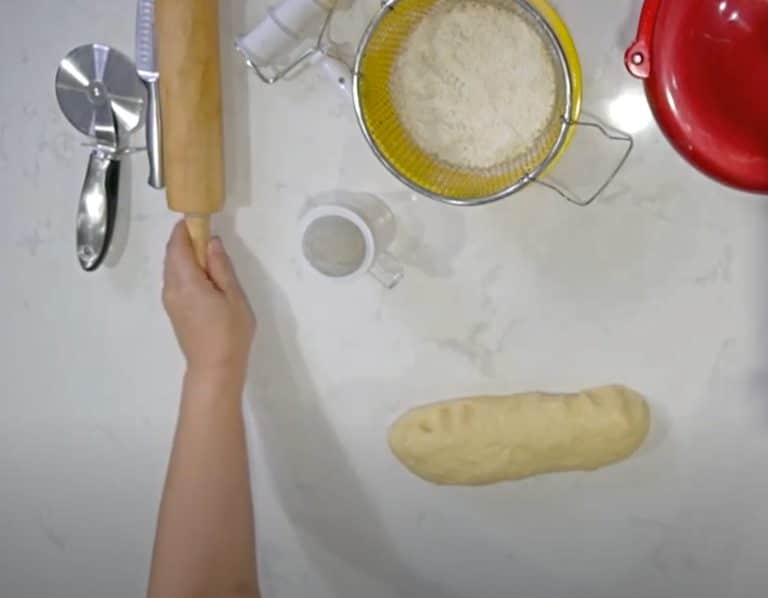
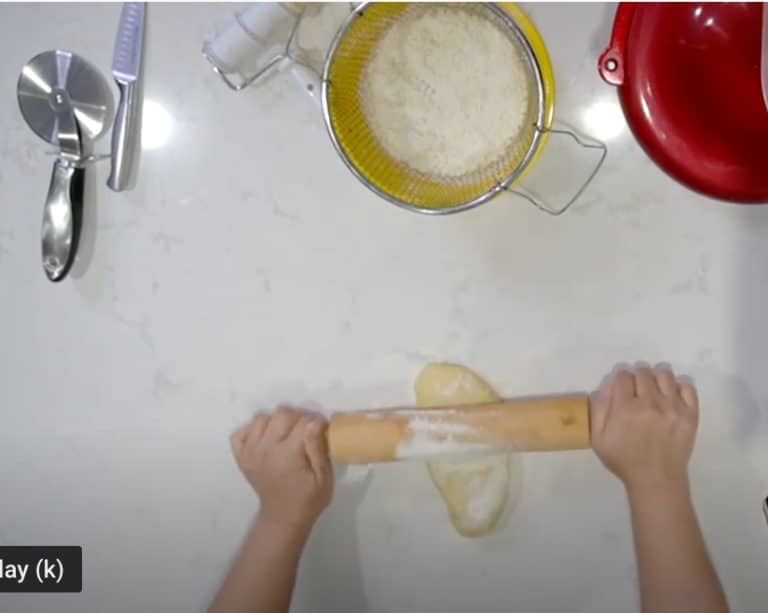
  • When the dough is ready, after about 20 minutes, take it out of the bowl and lay it on your work surface. You want it to feel smooth, fresh and light. If the dough is too moist and sticks to your hands when you pat it, sprinkle a small bit of flour over it: about 1 tsp. Work the flour into the ball with your hands for about 30 seconds. Pat it into the shape of a log, about 2 inches wide, 2 inches thick and 6 inches long. Lay it on your work surface.
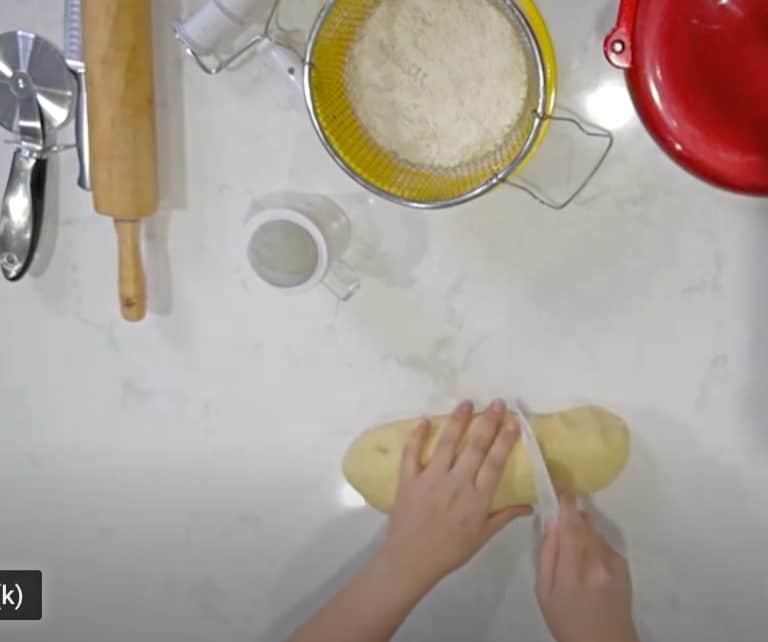
  • With a knife or spatula, cut 1/3 off the dough log. Return the other 2/3 of the dough to your bowl and cover it again.
  • Sprinkle another little bit of flour on your work surface. Pat the dough into a ball shape. Shape it into a log again. Sprinkle a tiny bit more of flour across its length.
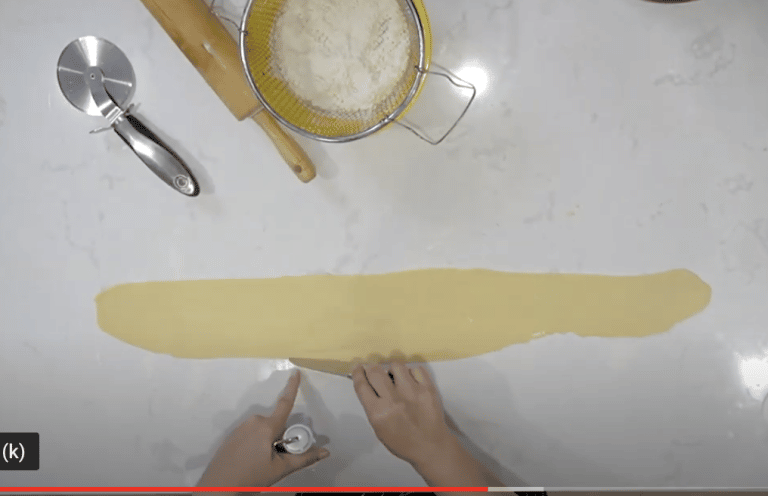
  • With a rolling pin, gently roll the log into a long and thin bar, about 5 inches wide, 2 feet long and ¼ inch deep.
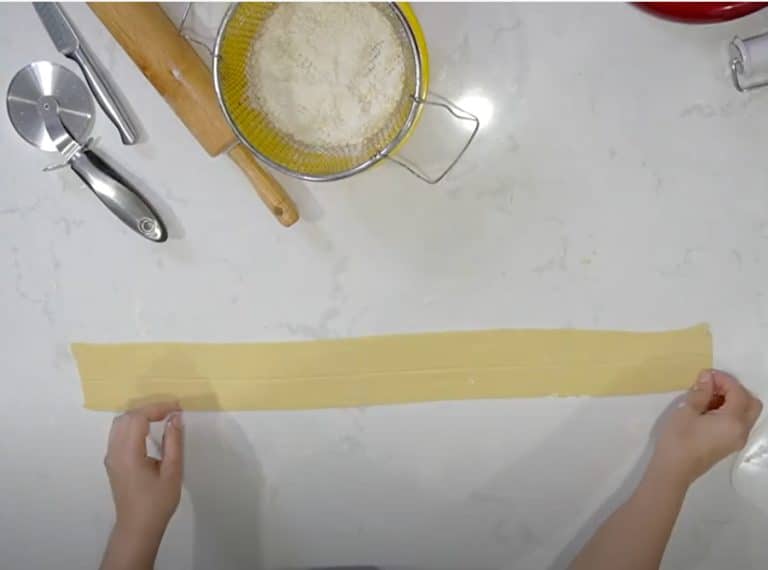
  • Using a pizza cutter wheel or. knife, slice horizontally along the length of the flour, so that you have two equal-length thin strands of dough side by side.
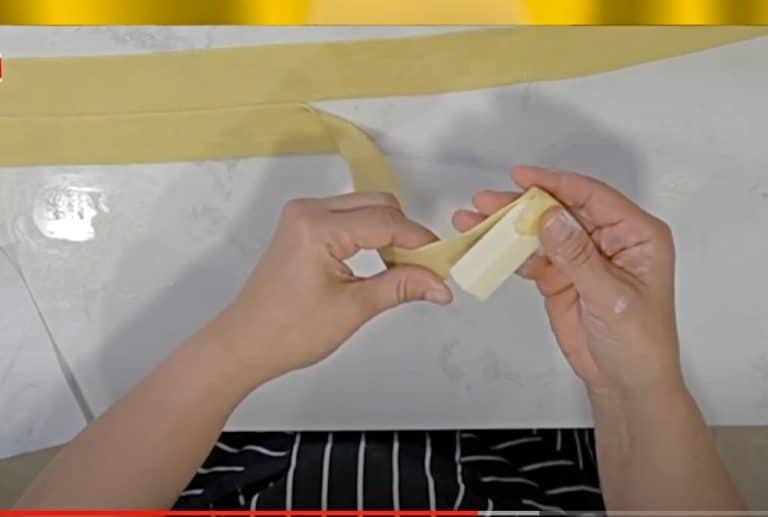
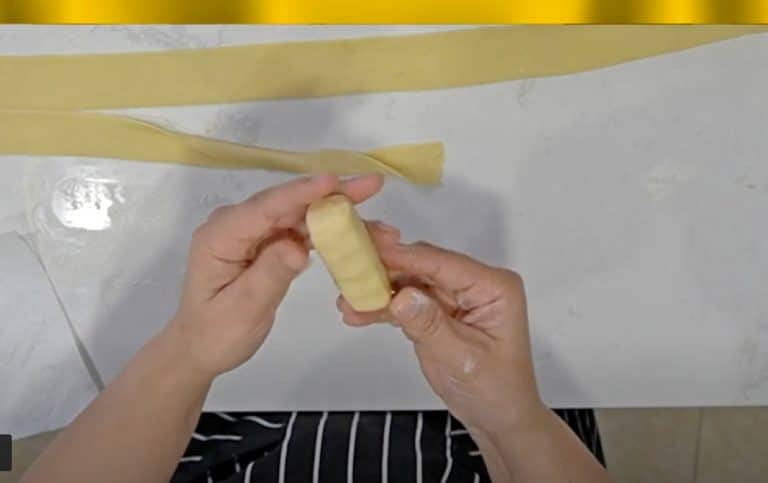
  • Pick up one of the half strands and gently place its top edge over the top of the cheese stick. Holding the dough firmly, wrap it around sides in overlapping layers so that the cheese stick is completely covered in dough, like a little mummy.
  • Wrap the dough around the bottom end of the cheese stick and loop it back around the side. Gently break the dough strand and press the edge into the dough, to seal it.
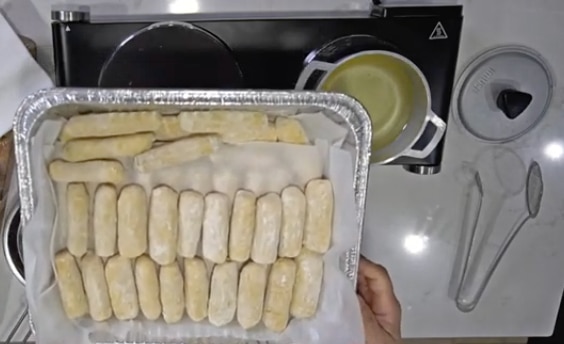
  • Once each tequeño is wrapped, Liliana recommends lightly rolling it with your palm on the floured surface to firmly seal all the dough edges. This way, when you fry the tequeño, the dough won’t be loosen or break away. Place all the wrapped and palm-rolled tequeños in a bowl or container with several tsps of flour sprinkled on the bottom, to keep the dough sticks floured and fresh.
  • You can also make tequeños with chocolate, says Liliana. Just substitute the amount of cheese with chocolate baking bars and wrap. If you use a product like his one, use two sticks per tequeño.
  • Repeat until all the cheese sticks are wrapped. You will have about 50 tequeños. Freeze for at least 30 minutes before frying or up to 3 months for later use.
  • Fry and Serve Your Tequeños
  • When ready to serve, take the tequeños out of the freezer. Let the frozen tequeños thaw slightly on your counter for 5 to 10 minutes.
  • In a large pan on medium heat, pour in the oil so that it is at least 2 to 3 inches deep. When it is frying hot, about 350°, with your tongs add the tequeños in batches. Be careful not to crowd them. Fry until each one turns light golden brown, about 2 minutes. Turn over and fry the second side: about 2 minutes.
  • Scoop out the tequeños and place on a paper towel-lined plate to absorb the excess oil.
  • When all are golden-fried, place on a serving platter and serve hot. Let la fiesta begin.

Notes

  • If you can’t find Venezuelan queso fresco, you can substitute Mexican white queso fresco.
  • If your dough is still too moist after resting for 20 to 25 minutes, sprinkle a little flour on it, but not too much or your dough will become hard: 1/2 tsp is about right to start with, says Liliana.
tequeño Venezuela
They are not traditionally served together in Venezuela, but when Liliana was living in Mexico—land of salsas and guacamole—she found herself serving her homemade tequeños with a side of guasacaca, Venezuela’s signature condiment made with avocados to accompany grilled meats. Her friends in Mexico loved the pairing.

More
Like This

More Delicioso Family Recipes & Articles We Think You’ll Like!

You May Also Like

Got a question or suggestion?

Please rate this recipe and leave any tips, substitutions, or Qs you have!

Share Your Thoughts

Your email address will not be published. Required fields are marked *