Liliana’s Hallacas, Venezuela’s Holiday Tradition
- December 2021
- By Liliana Hernández
- Recipe from Venezuela
-
- (20)
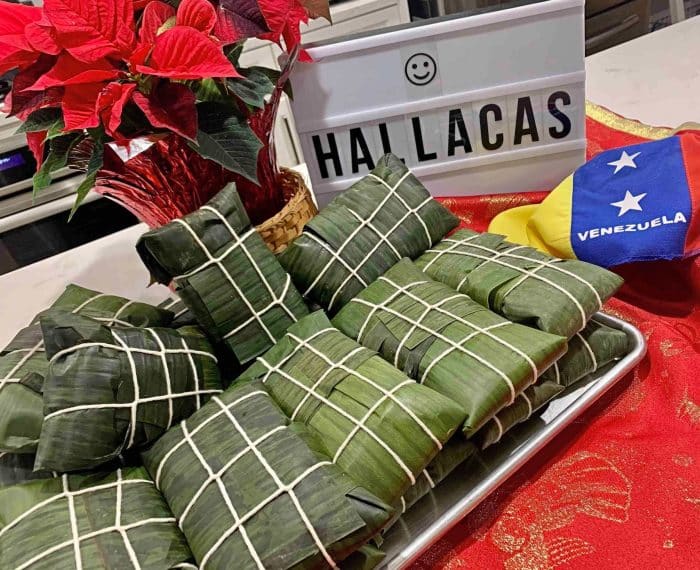
Hallacas are Venezuela’s delicious version of tamales, and the look-forward-to-all-year favorite comida of our No. 1 Venezuelan home cook Liliana Hernández. She makes them without fail every December, even though it’s muchísimo trabajo: a two-day labor of love. “I’m from Venezuela. We have been in the States eight years now, so our two sons say they feel pretty American. I want to make sure that they know they are also Venezuelan, and that they experience our tradition of eating this holiday meal every Christmas season.”
Hallacas are similar to Mexican tamales in that they are wrapped, steamed and filled with a delicious savory stew or guiso. But their differences are unmistakable: Venezuelan hallacas use precooked corn flour for their masa, not the dried and nixtamalized corn masa harina Mexican tamales use, and they are wrapped in banana or plantain leaves—not corn husks.
That said, hallacas are exactly like Mexican tamales in that they are a special meal made with mucho amor and trabajo in late December—with all the members of the family pitching in.
“I remember being a little girl in Venezuela and my whole family working together to make these hallacas,” says Liliana. ”I was the youngest and my special job was to wash the plantain leaves that we were going to be using for wrapping the tamales.”
The History of Hallacas in Venezuela
Hallacas are as traditional as food gets in Venezuela. They go back at least 500 years in the country’s comida history.
As Familia Kitchen’s culinary history buff Emilly Olivares reports in her article Venezuela’s Food History—Arepas, Hallacas y Más!: ”The hallaca’s exact origin isn’t recorded, however lore and food historians suggest that the dish was created during the Spanish colonization period by enslaved indigenous and African people. On festive occasions, they were known to gather the leftovers from the kitchens of the wealthy Spanish. Using masa de maíz, which we know was abundant and easy to access, they would make masa, fill it with the remnant comida, and wrap the resulting rellenos in banana leaves.”
We have a saying in Venezuela: The home that does not serve hallacas in December is a casa triste—a sad home.
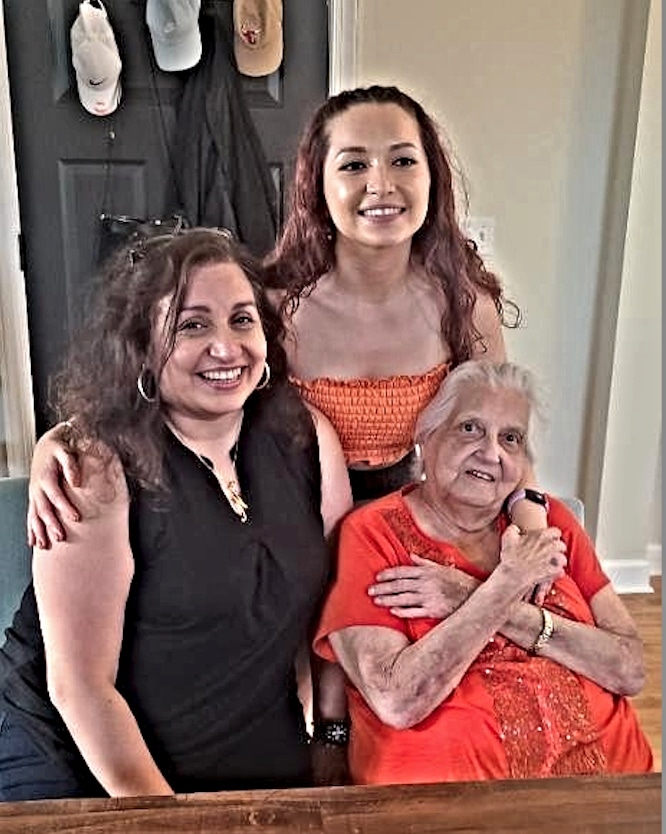
Liliana Hernández, one of our favorite Venezuelan (and happiest) home cooks
Venezuela’s hallacas are made with “the same precooked, ground corn flour that we use to make our arepas,” says Liliana. Hallacas are usually stuffed with a guiso or stew made with beef, pork or chicken. Or, in Liliana’s case, all three—in the same filling.
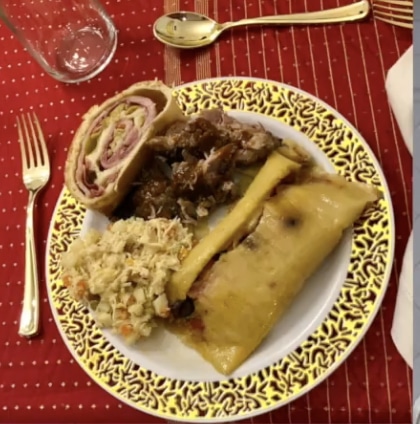
”Our Venezuelan hallacas are like the Mexican tamales you find in Oaxaca, wrapped with plantain leaves. We Venezuelans love our carbs so much that even when we eat hallacas, we still add a piece of bread on the side.”
A Christmas Tradition in Venezuela
For a nostalgic Venezolana like Liliana, who lives in the Chicago area, the idea of Christmas without hallacas is … well, not Christmas.
“Hallacas are very sentimental for us. We have a saying in Venezuela: the home that does not serve hallacas in December is a casa triste—a sad home,” says Liliana. ”That’s why I have dedicated myself every single year to making sure that hallacas are made in my house. So that my sons have this tradition. They get into it and help me make them.”
Should non-Venezuelans take the time to cook them, too?
”You must make them!” says Liliana. Because—and we quote her three-exclamation-marks email to Familia Kitchen:—“¡¡¡Son DELICIOSAS!!!”
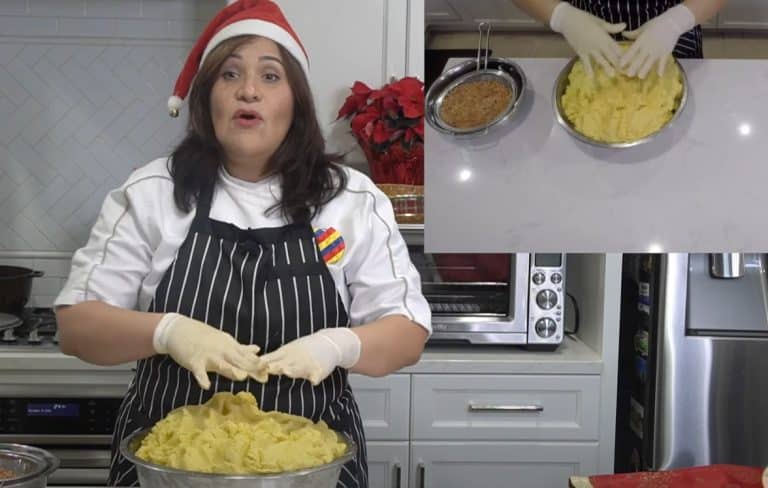
To see how Liliana make these plantain leaf-wrapped and steamed delicacies—step by step by step by step (Yes, there are muchos steps. Totally worth it!)—check out her video master class on hallacas.
And then, grab your family and friends and team-cook your way through preparing hallacas for the holidays. Liliana promises Venezuela makes the best masa-stuffed meal on earth.
For more of Liliana’s authentic Venezuelan family recipes, try her life-changing bienmesabe cake, asado negro main dish for celebrations, can’t-stop-at-one cheese-stuffed tequeños, handmade toasted corn flour arepas, reina pepiada and carne mechada arepa fillings, and her mother’s go-to ensalada rusa potato salad. All are 100% delicioso. And be sure to check out Liliana on her YouTube channel Mi Show de Cocina, where she is working her way through favorite Venezuelan dishes like these hallacas and more!
A Celebration of Tamales Around el Mundo
Curious about tamales around el mundo—and the many names they go by?
In honor of the festive holiday season this year and every year, Familia Kitchen is honored to spotlight special family-famous recipes of masa-stuffed wonders across Latino cultures. Whether they are called tamales, pasteles, hallacas, humitas, check out these beloved family-famous recipes:
• Luis’ Guatemalan tamales;
• Michelle and Pat’s Puerto Rican yuca, plantain, green bananas & pork pasteles;
• Doña Paula’s Belizean tamales;
• Lisa’s Panamanian chicken & pork tamales
• We even celebrate legendary Mexican artist Frida Kahlo’s favorite red pork tamales!
If you want to go deeper, check out our history of tamales and corn in Mexico and across Latinx cultures, and Angela’s culinary inquiry into why so many Mexican families eat tamales every Candelaria feast on February 2!
Check Out Liliana’s Master Class in Venezuelan Hallacas—Step by Step!
Liliana’s Hallacas, Venezuela’s Holiday Tradition
50
12
hours3
hoursIngredients
- Banana Leaf Wrapping & Tying Materials — Day 1 Wash & Prep
15 lbs plantain or banana leaves (packages usually weigh 1 lb each)
500 feet kitchen twine (1 large spool)
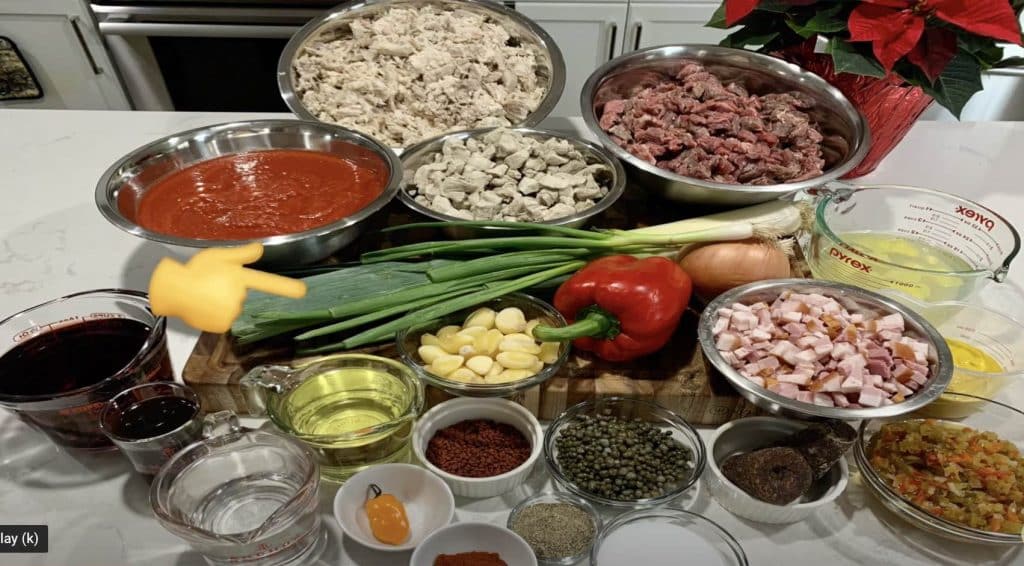
- The Guiso or Stew Filling — Day 1
2 1/4 lbs pork, chopped into small pieces
4 1/2 lbs skirt or flank steak, cubed or cut into small strips
4 1/2 lbs chicken pieces, bone-in or boneless, boiled and shredded (reserve the broth)
1/2 cup vegetable or olive oil
2 Tbsp annatto seeds
1/2 cup bacon, raw, diced
5 oz onions, minced or grated
3/4 cup garlic, crushed
1 2/3 cups leeks, sliced into match sticks
1/4 cup chives, finely chopped
1/2 cup tiny capers
1 1/2 cups panela, papelón or piloncillo (unrefined whole cane sugar)
6 to 8 red peppers, diced
4 ají dulce peppers or 1 to 2 habanero peppers, minced
2 cups red wine, like moscatel or marsala
3 Tbsp salt, or to taste
1 tsp black pepper, or to taste
1 cup giardiniera (pickled vegetables), diced
1/2 cup white vinegar
1/2 cup Worcestershire sauce
1/2 cup yellow mustard
28 oz tomatoes, canned, peeled, diced
1 1/2 Tbsp paprika
1/2 to 1 cup precooked corn flour, depending on desired guiso texture
2 cups chicken broth
- The Masa — Day 2
6 1/2 lbs precooked corn flour
4 to 5 cups lard or shortening
5 quarts chicken broth (reserved: from boiling the chicken on Day 1)
4 tsp salt
6 Tbsp annatto seeds
6 cloves garlic, chopped in half
3 lbs bacon, chopped
- The Annatto Oil to Brush on Hallaca Leaves — Day 2
1 cup achiote oil (1 cup vegetable or olive oil + 4 Tbsp annatto seeds)
- The Garnishes for the Hallaca Filling — Day 2
4 to 5 onions, thin-sliced into wheels (2 per hallaca)
4 to 5 red bell peppers, thin-sliced julienned (2 to 3 per hallaca)
1 cup tiny capers (1/2 tsp per hallaca)
2 cups manzanillo olives (2 per hallaca)
2 cups raisins (6 per hallaca)
1 cup giardiniera, minced (1/2 tsp per hallaca)
2 cups smoked turkey bacon, in bite-size pieces (2 per hallaca)
Directions
- DAY 1 — Prep the Meat for the Guiso Stew
- Boil the pork for 10 minutes. Set aside to cool and refrigerate for Day 2.
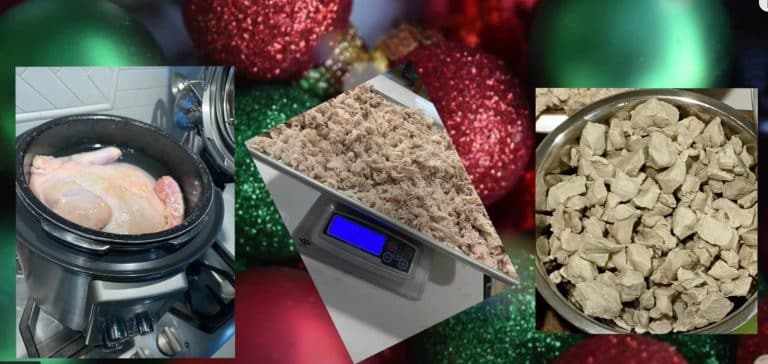
- Boil the chicken in water to cover for about 1 hour or in a pressure cooker for about 40 minutes, until it is tender and falling off the bone, if using bone-in. Shred. Set aside to cool and refrigerate for Day 2.
- Slice the skirt or flank steak into small, raw pieces. Store in your fridge for use on Day 2.
- DAY 1 — Prep the Vegetables for the Guiso or Stew
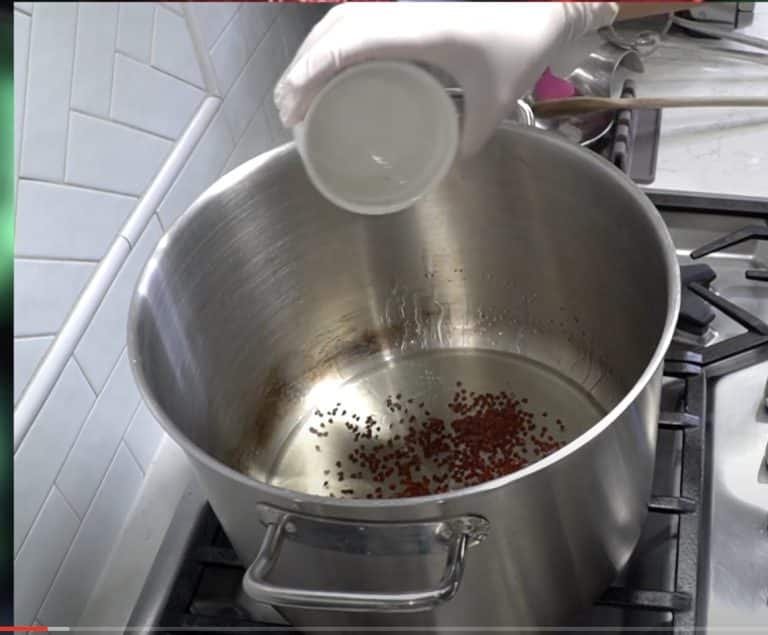
- In a large pot, add the oil and the annatto seeds over low heat.
- Once the oil takes on a orangey-red color, remove the seeds and reserve for the next day. Do not let the seeds burn in the oil. To the annatto oil, add the chopped, raw bacon, stir and let it cook until it looks cooked and translucent, but not get crispy.
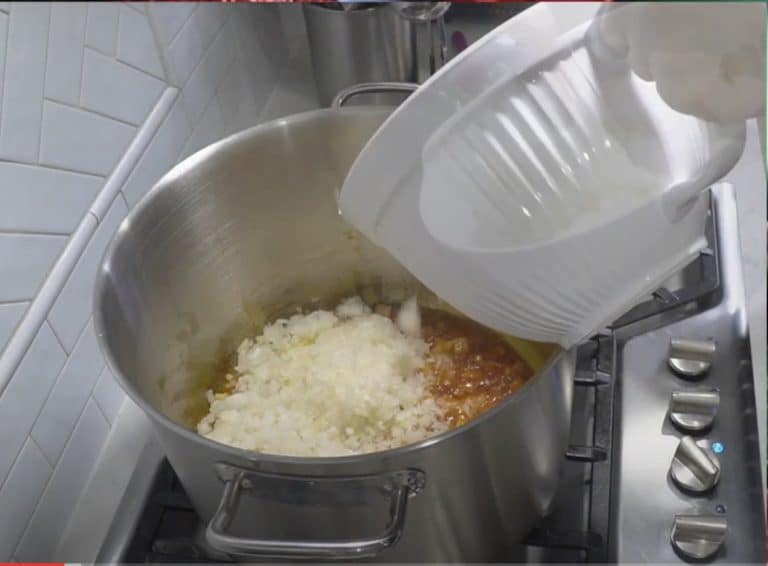
- Add the chopped onions. Stir and let cook for 5 to 6 minutes, until translucent. Add the garlic and stir.
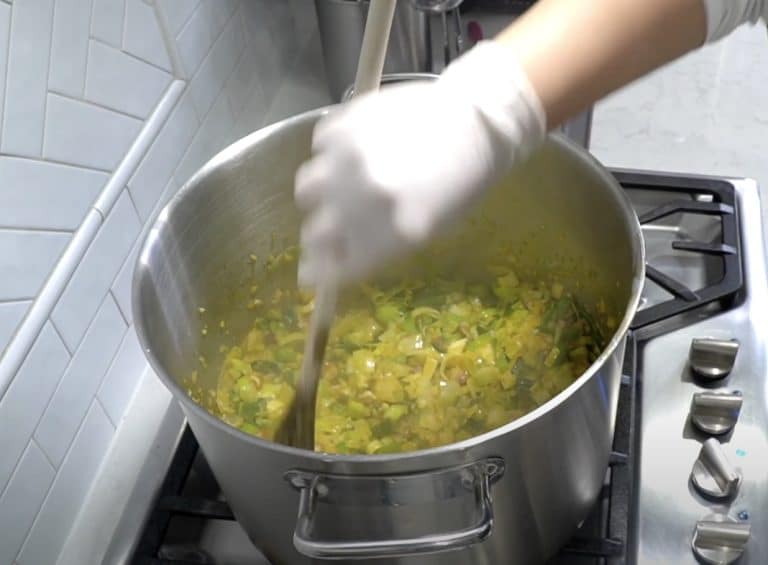
- Once you can smell the garlic, stir in the leeks and chives. Stir.
- Add the minced ají dulce or the habanero—your choice. Stir. Add the minced red bell pepper. Stir. Let the vegetables simmer about 6 minutes.
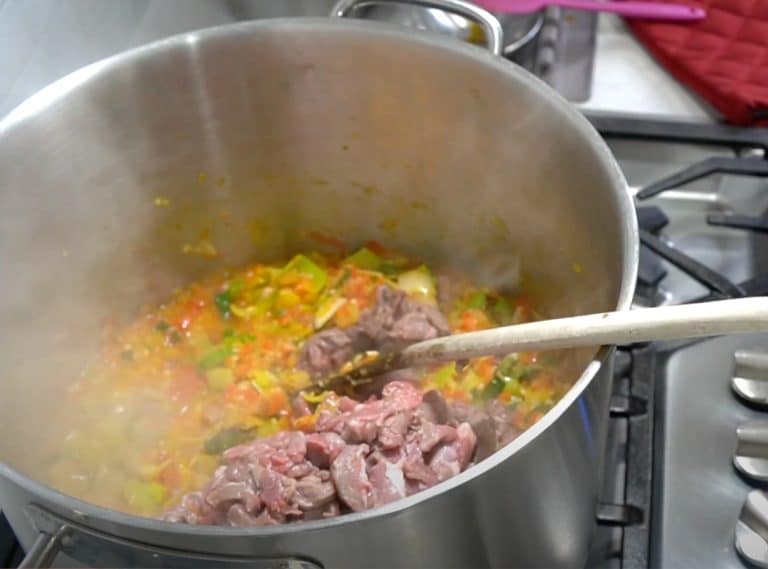
- Add the raw chopped flank or skirt steak. Stir to mix in well. Turn up the heat to medium high, cover with a lid and let it cook for about 10 to 15 minutes.
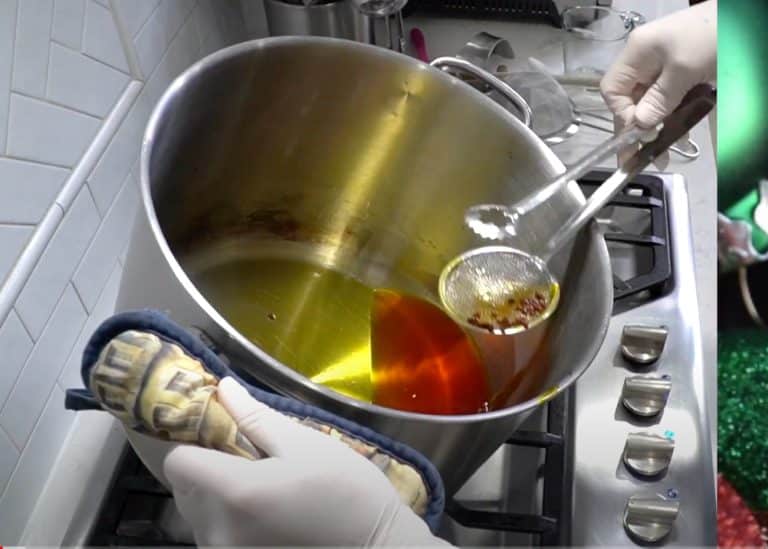
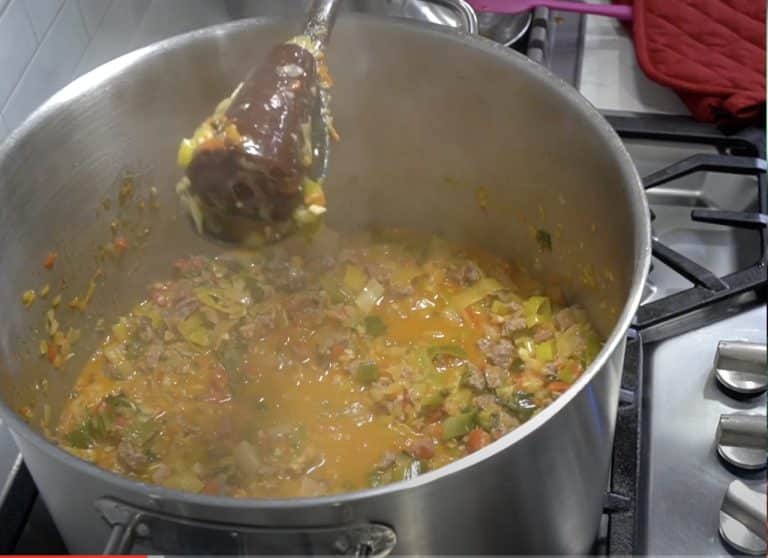
- Remove the lid, stir. Stir in the capers. Add the papelón (unrefined sugar cane) for a rich sweet flavor. It will melt as you stir it into your stew.
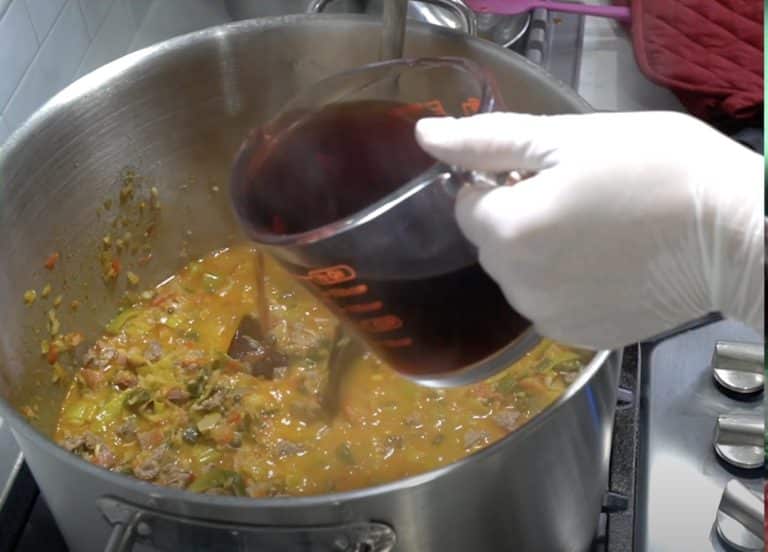
- Add the wine, salt, and pepper. Stir and let it reduce for a few minutes.
- Add the giardiniera, vinegar, mustard, Worcestershire sauce, paprika and tomatoes. Cover and let it cook on low heat for 10 minutes.
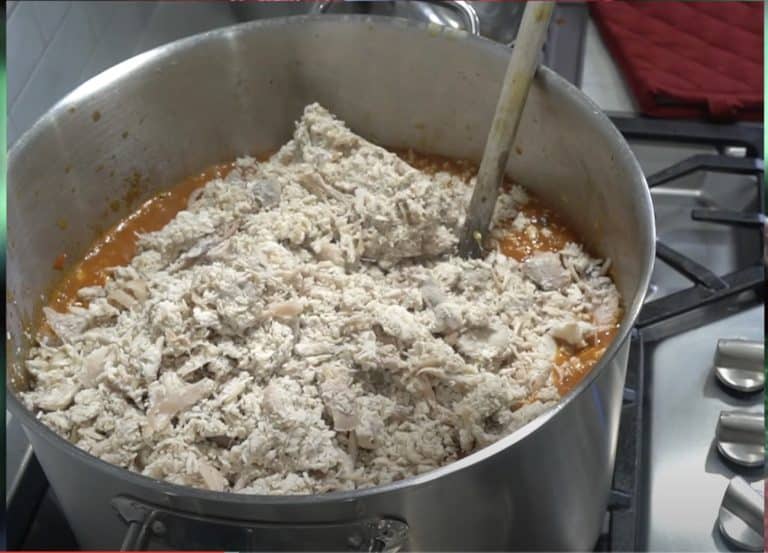
- Add the cooked pork and shredded chicken from Day 1 to your mix. Stir together well.
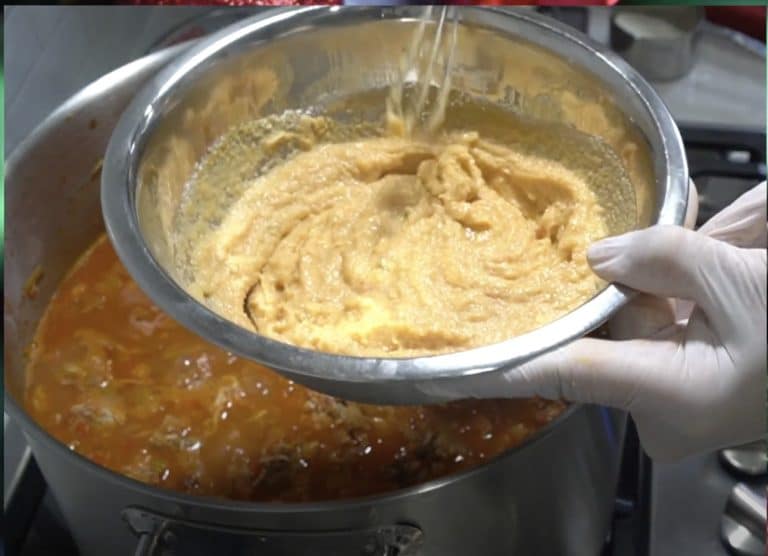
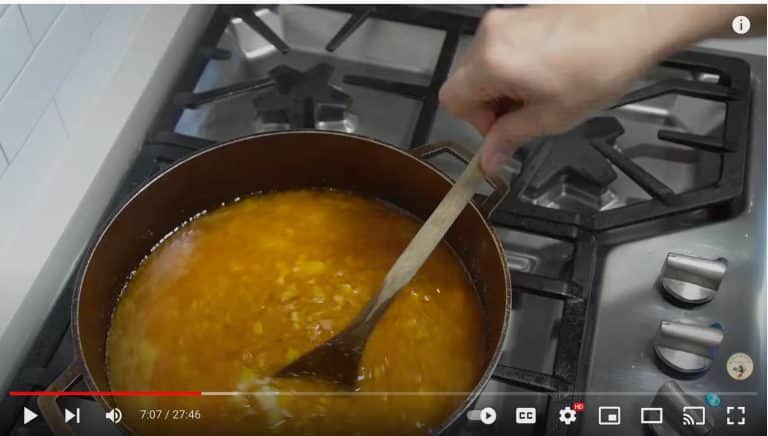
- Make a thickening sauce with the corn flour. In a small bowl, whisk together 1/2 to 1 cups of the precooked corn flour and with 1 to 2 cups of liquid from a combo of the stew you are making and chicken broth (Liliana uses half and half). Whisk the corn flour sauce into your stew and stir wel.
- Cover your guiso and simmer on low heat for the last 15 minutes. When your stew is done, Liliana promises it will taste delicious! Turn off the heat, let the mixture cool, and place in your refrigerator—ready to use when building your hallacas on Day 2.
- DAY 1 — Clean and Organize the Banana or Plantain Leaves
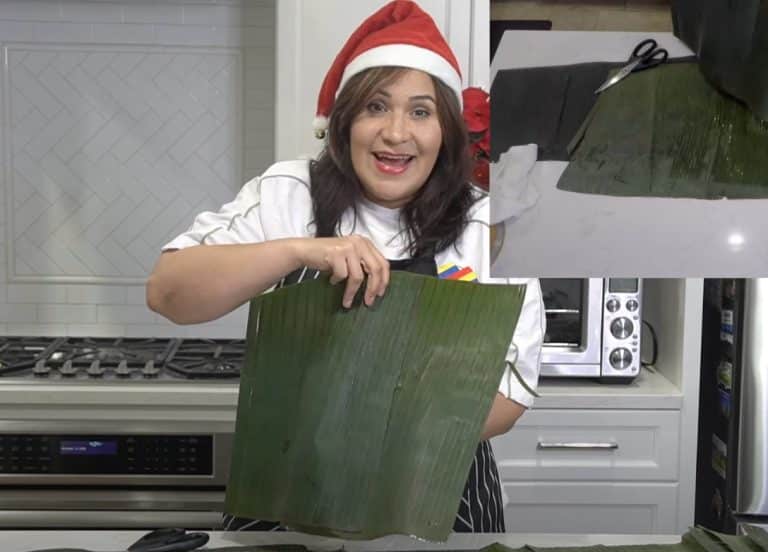
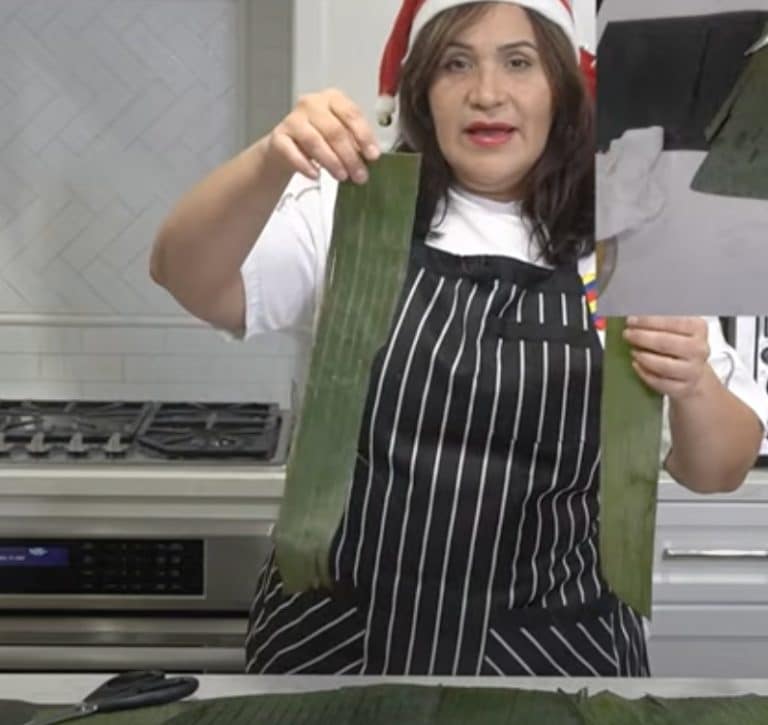
- Wash and dry all the banana leaves. Cut into three sizes, if they don’t come precut. You’ll need one of each of the three sizes for each of your hallacas.
- Cut 50 large outside leaves: These are large squares about 12 by 12 inches. (Or take 2 smaller leaves and layer them together to make a large size leaf.) These will be used as the outside leaf to hold and protect the hallaca from when being steamed.
- Cut 50 medium leaves: These are about 8 inches tall and 8 inches wide. These will hold the masa and delicious filling and wrapped inside the larger leaf during steaming.
- Cut 50 small, skinny and long strips that are about 2 to 3 inches wide and 12 inches long. They are called fajas or fajitas in Venezuela. (Fajas means girdle, so appropriate!) You will use these to tie each hallaca closed before steaming.
- When all the banana or plantain leaves are washed, dried, cut and ready, store them in the refrigerator overnight for use on Day 2, when you stuff and wrap the hallacas.
- DAY 2 — Prep the Annatto-Garlic-Bacon Oil for the Masa
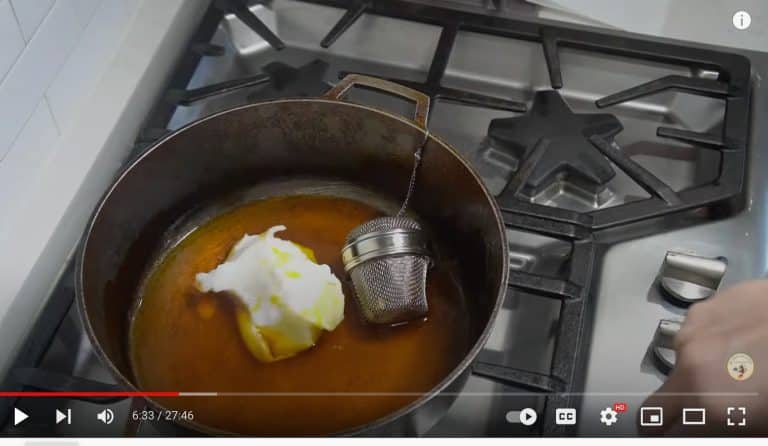
- In a large pot, melt the lard or shortening in a pan. Warm over low heat. Add the annatto seeds, stirring constantly over low heat for 1 minute or 2. Simmer for a few minutes. Stir. When the oil takes on a rust color, it is done. (Keep an eye on it so that you don’t burn the seeds or your oil will take on a bitter taste.) Remove the annatto seeds and reserve for reuse on Day 2.
- Add the garlic, stirring constantly, for 1 minute or 2. When you begin to smell the garlic, add the raw bacon pieces. (You can skip adding bacon, if you are using flavorful pork lard.). Let the bacon cook over low heat, stirring regularly, until it starts to turn translucent and pink. Turn off the heat and set aside to cool.
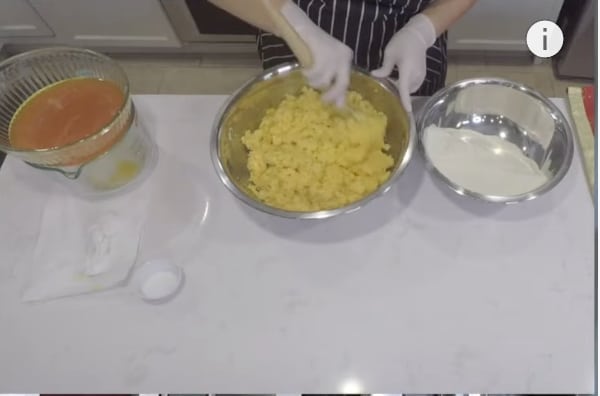
- DAY 2 — Make Your Masa
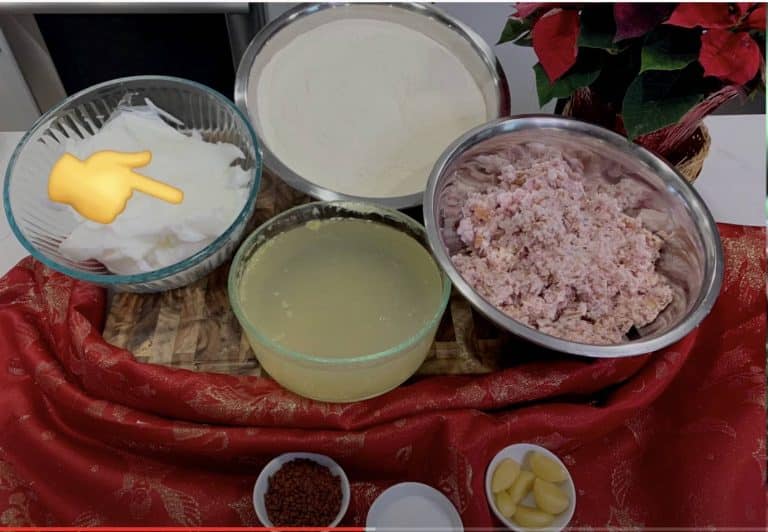
- Gather your ingredients: pork lard or shortening, precooked corn flour, chicken broth, cooked bacon, whole garlic, salt, pepper.
- Always start making masa with the liquids, says Liliana. Pour the broth (reserved from Day 1, when boiling the poultry) into your largest mixing bowl.
- Add the bacon-garlic-annatto oil mix to the broth. Stir. Add the salt and the precooked corn flour. Mix them together, well.
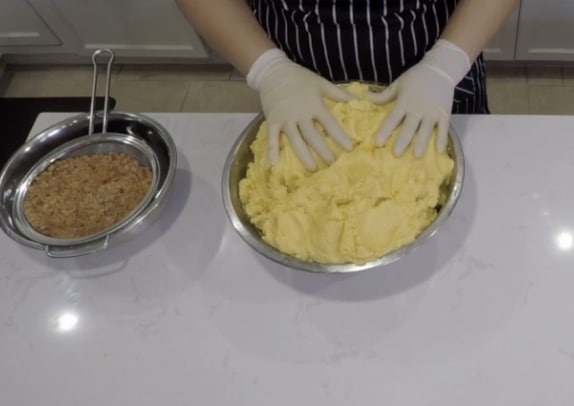
- Fold in the cooked bacon into the masa, working it into the dough with your hands until it is fully incorporated. This will give your masa delicious, rich flavor, says Liliana.
- Set the masa bowl aside, covered with a damp kitchen towel or plastic wrap, for at least 10 minutes.
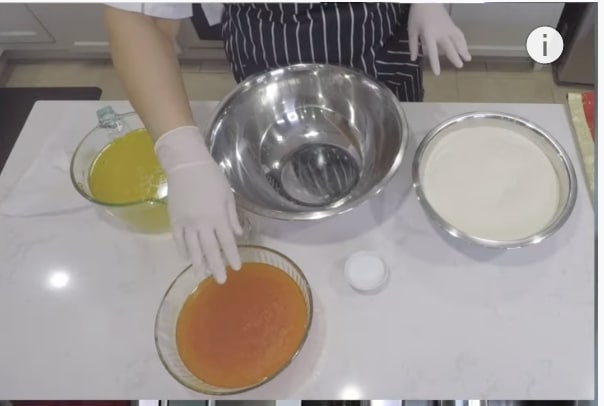
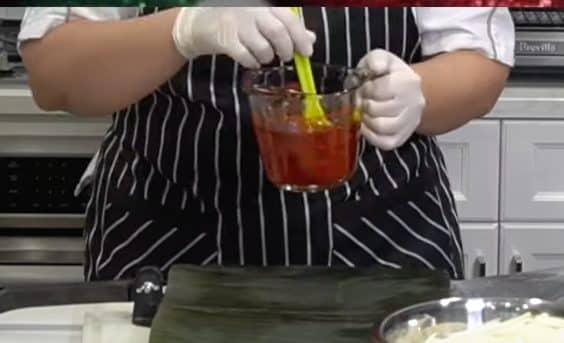
- DAY 2 — Make Your Annatto Oil to Brush on the Banana Leaves
- Mix 1 cup of vegetable or olive oil with the annatto seeds you used the day before. Let them steep in a small bowl or glass jar for 5 minutes. When ready, discard the seeds.
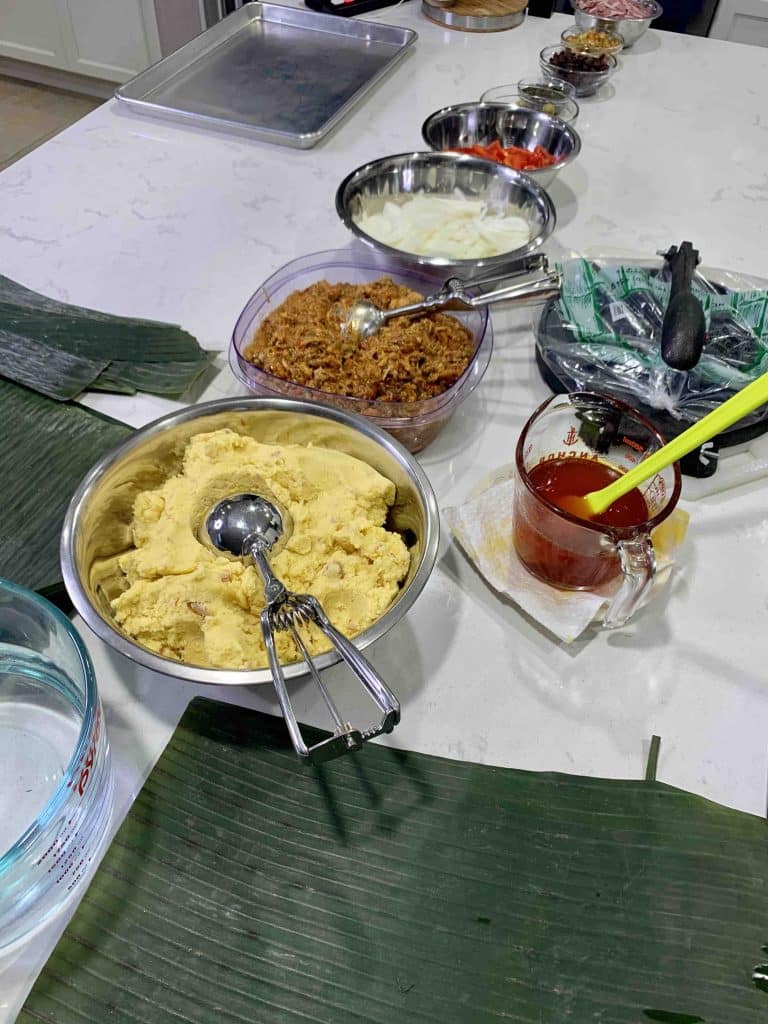
- DAY 2 — Time to Build Your Hallacas
- Prepare your hallaca-building workspace. Lay out a series of 9 bowls or cups, each dedicated to one of the ingredients you’ll use to build each individual hallaca. These are: a) the masa, b) beef, pork and chicken guiso filling, c) onion thin rounds, d) red pepper thin slices, e) olives, f) raisins, g) capers, h) smoked turkey bacon strips, and i) the annatto oil you just made.
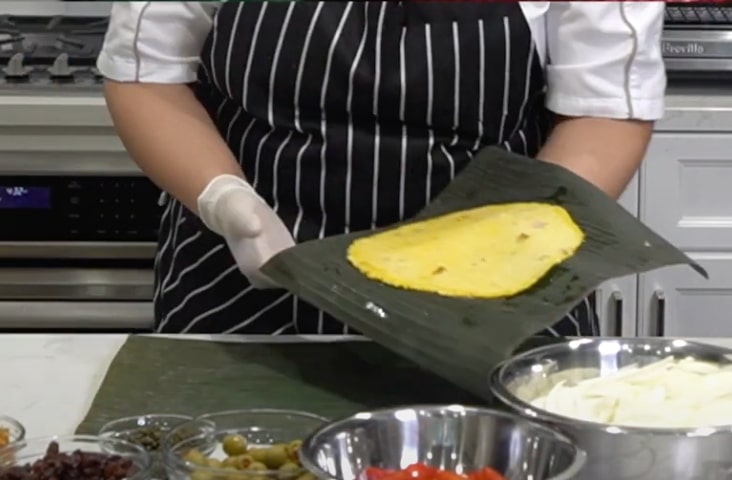
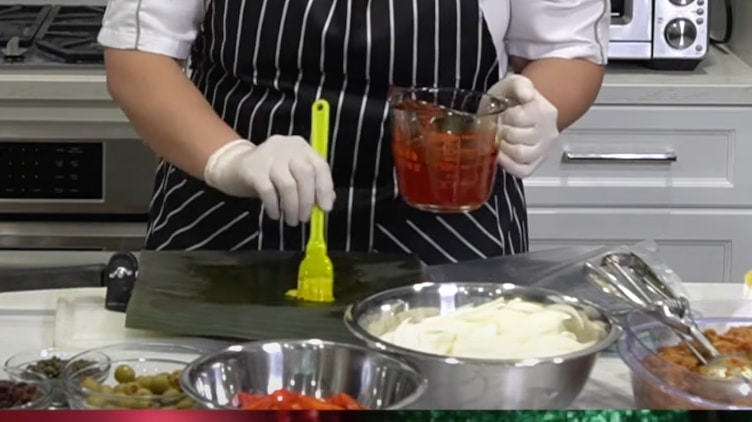
- To make each hallaca, lay out a medium banana leaf on your flat work surface. Identify the brighter green side that has the more prominent leaf veins. This is the inside of your plantain “plate.” Brush it with about ½ tsp of the annatto oil.
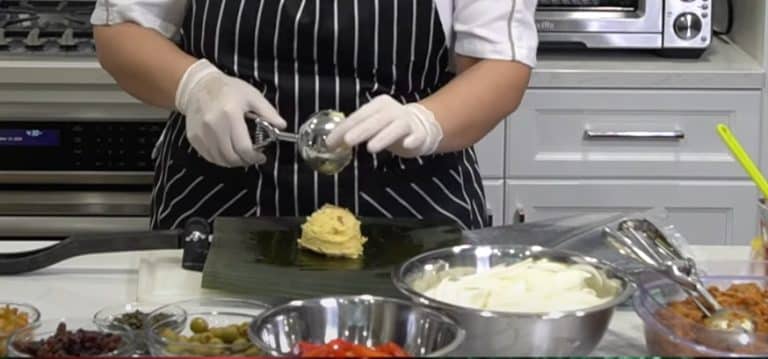
- Add about 3 Tbsp of masa (Liliana uses an ice cream scooper) to the center of the leaf. Brush the top of the masa with a small amount of annatto oil. Press the dough into a flat and thin circle about 5 inches wide, with your choice of one of the following, wrapped in plastic: a frying pan, dinner plate, cutting board, or large tortilla press.
- Lay a medium leaf with the masa on top of a large leaf. Identify which way the veins run on the large leaf. Lay the medium leaf on top of it so that its veins run perpendicular to the large one’s pattern. (This will make your double-leaf wrapped hallacas stronger when you steam them.)
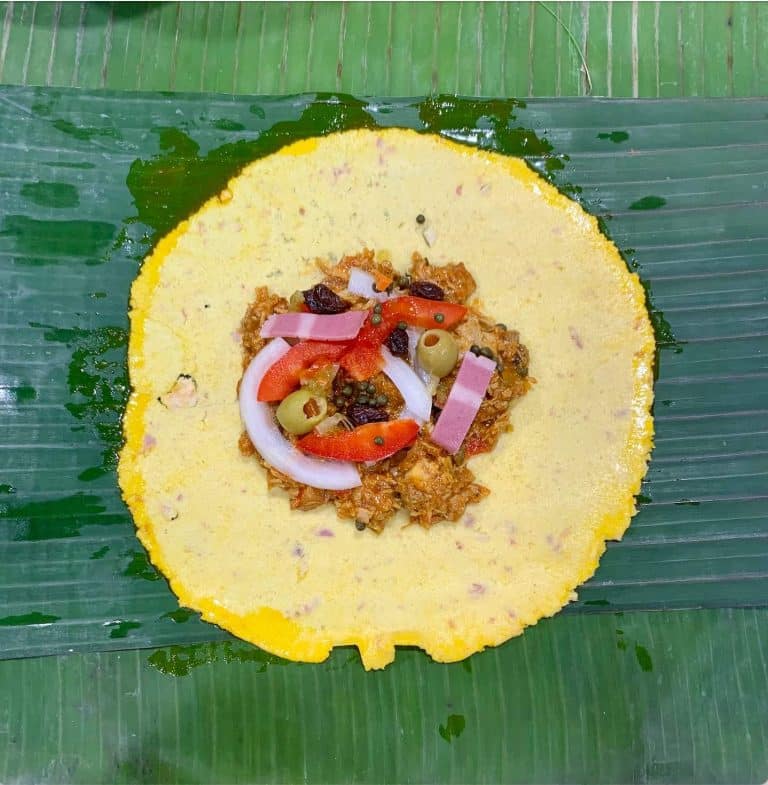
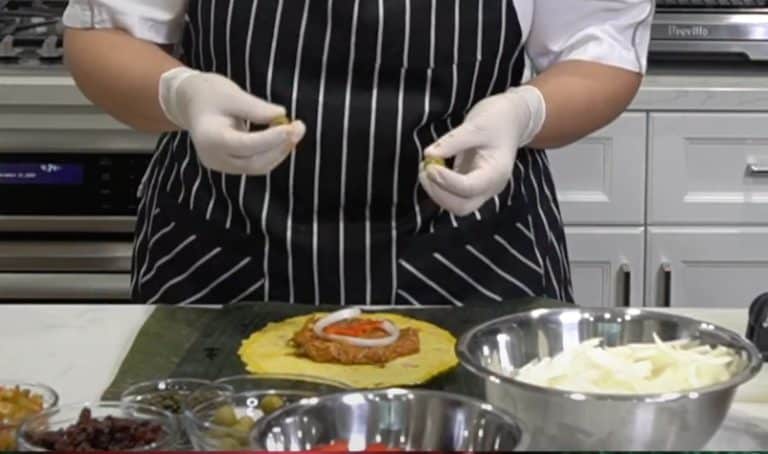
- Add about 1/2 cup of the guiso or stew filling on top of the masa circle on the medium leaf. Smooth the filling with the back of your spoon so that it is flat—ready for the garnishes!
- DAY 2 — Garnish Your Masa Filling
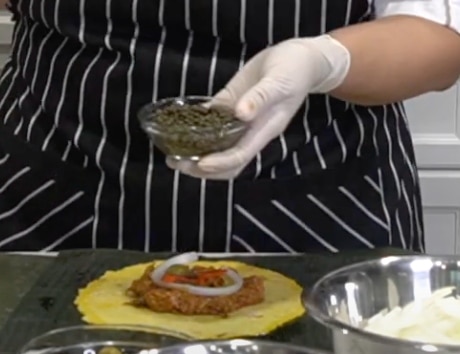
- Layer the following garnishes, in this order, on top of the masa and guiso stew: 2 onion rings, 2 to 3 red bell pepper thin strips, 2 olives, ½ tsp capers, 6 raisins, ½ tsp giardiniera, and—last—the 2 to 3 small strips of turkey bacon.
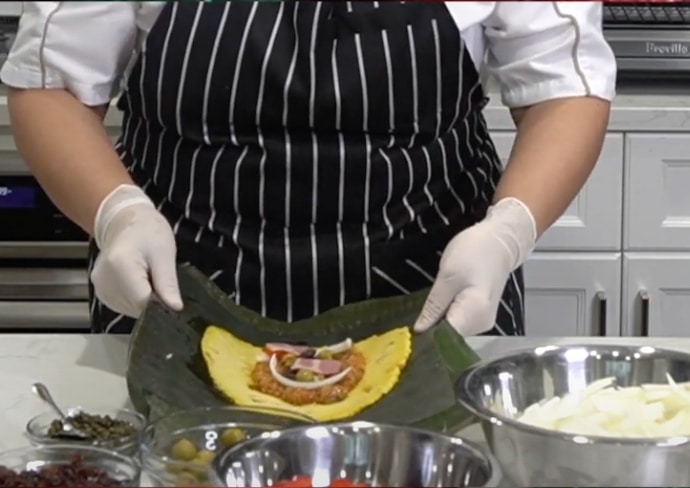
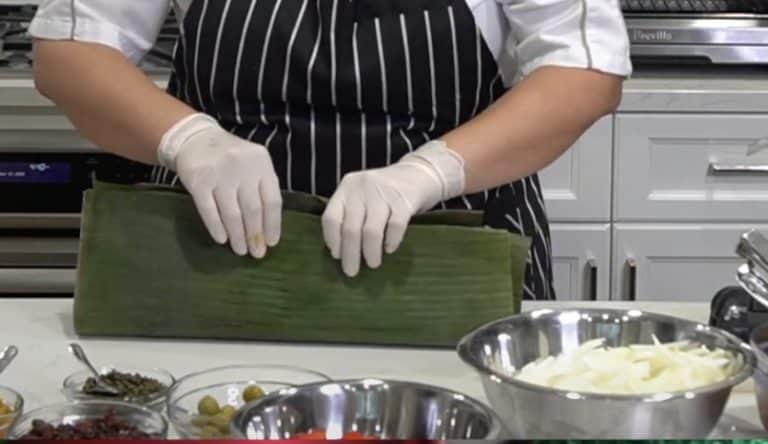
- DAY 2 — Fold Your Hallacas
- Pick up the two top edges of your large banana leaf, which lies below the medium banana leaf.
- Fold the large leaf carefully in half (as if you are closing a precious book with two hands), so that the tops of the masa circle’s halves come together edge to edge and the tops of the large banana leaf edges also match up.
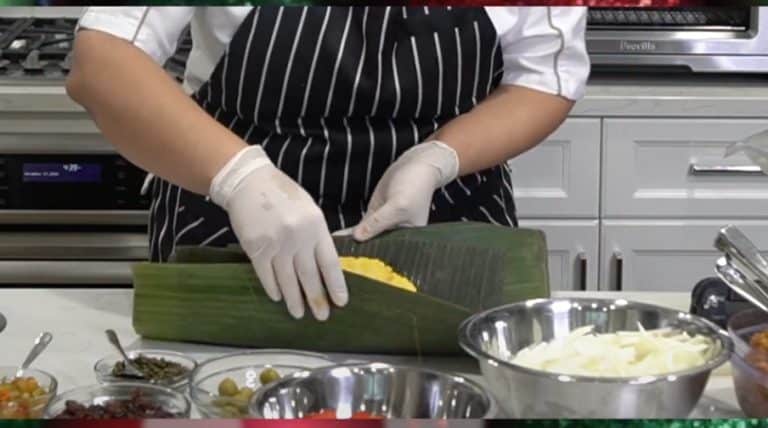
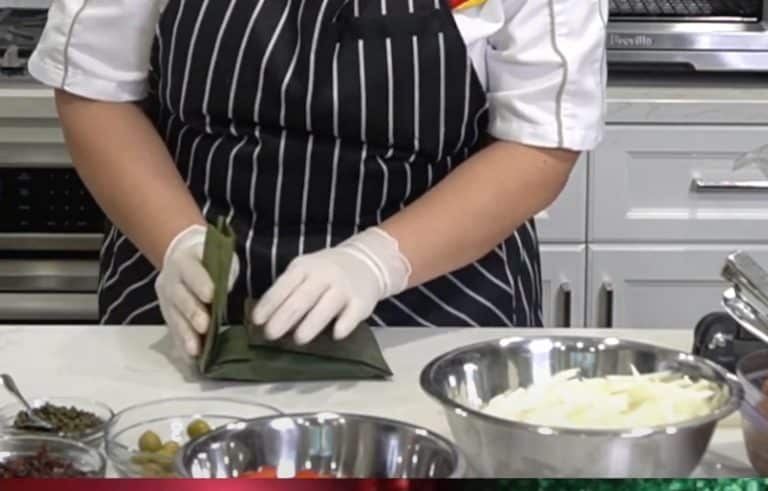
- Fold over the top edges of the now-joined large banana leaf (to where you feel the masa mound begin)—about 2 inches down. Then, fold them down again—another 2 inches. You will have a long, thin envelope-like masa-leaf package.
- Now fold the two other sides. Take the large leaf’s unfolded wide edges and fold each one into the middle.
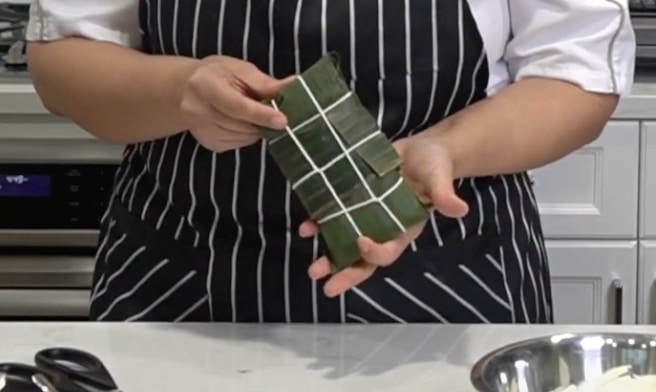
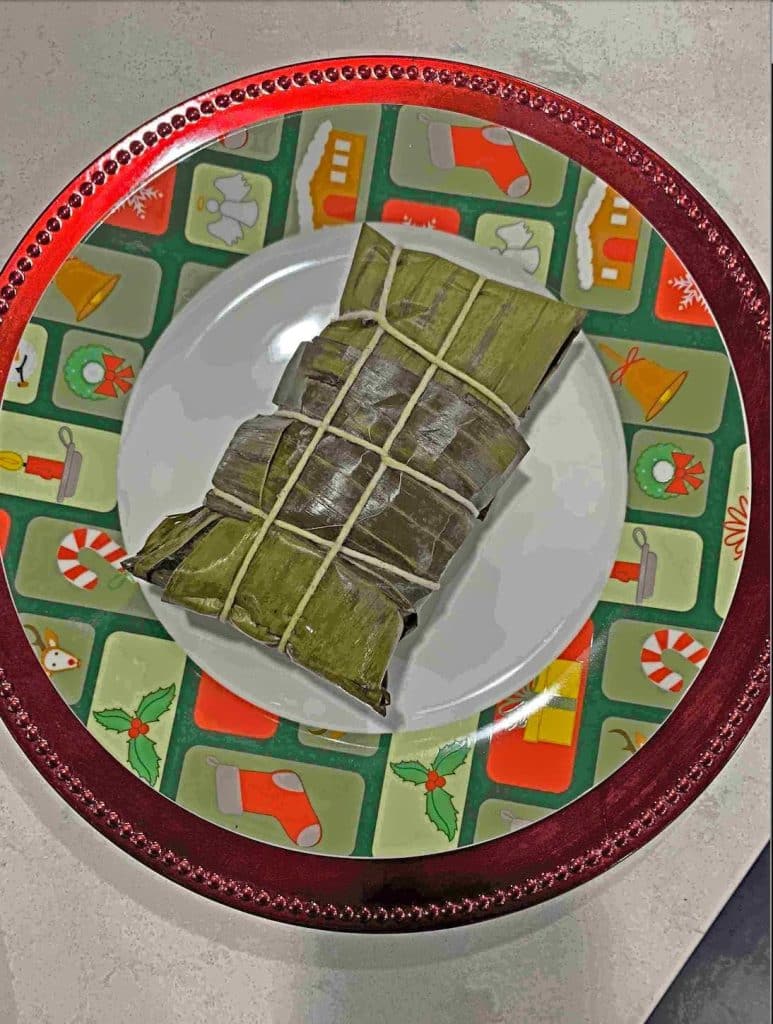
- Time to put the small piece of banana leaf—the fajita—on the hallaca. Take the thin, long banana strip fajita and wrap it around and around the banana leaf-wrapped package, horizontally, as if you were wrapping a bandage. You will have a tidy rectangle package.
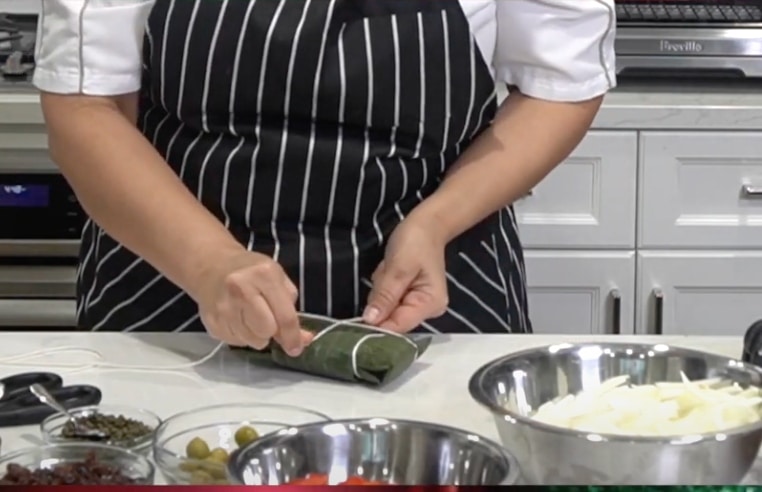
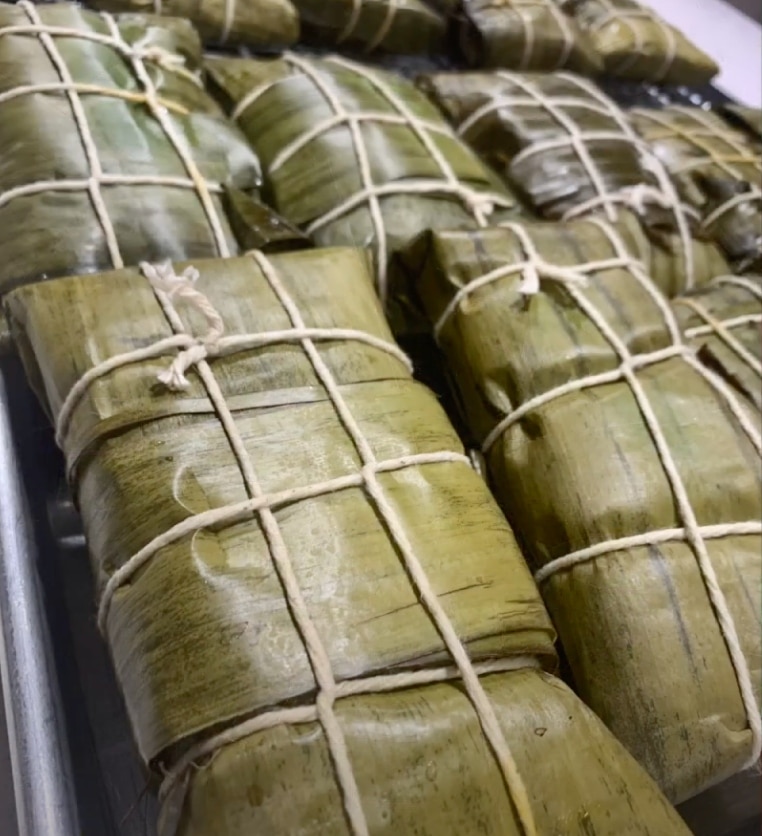
- DAY 2 — Tie Your Hallaca with Kitchen Twine
- Cut a 4- to 5-foot-long piece of cooking twine. Wrap it around the top end, criss-crossing the string around the width of the hallaca: one, two, three times on the first side, each an inch apart.
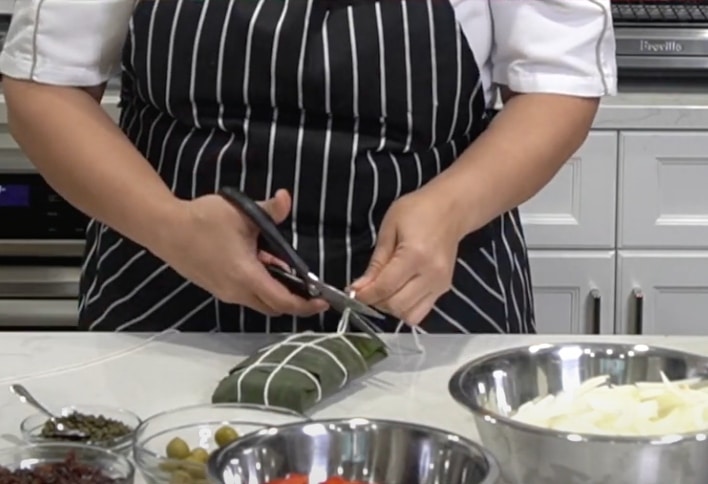
- Repeat three times on the second side, each an inch apart. Tie the end of the strings into a tight knot. Run the string strand the other way: around the top and bottom twice. Tie a double knot, cut, and you are done.
- Repeat 50 more times, or however many hallacas you are making—and you are done!
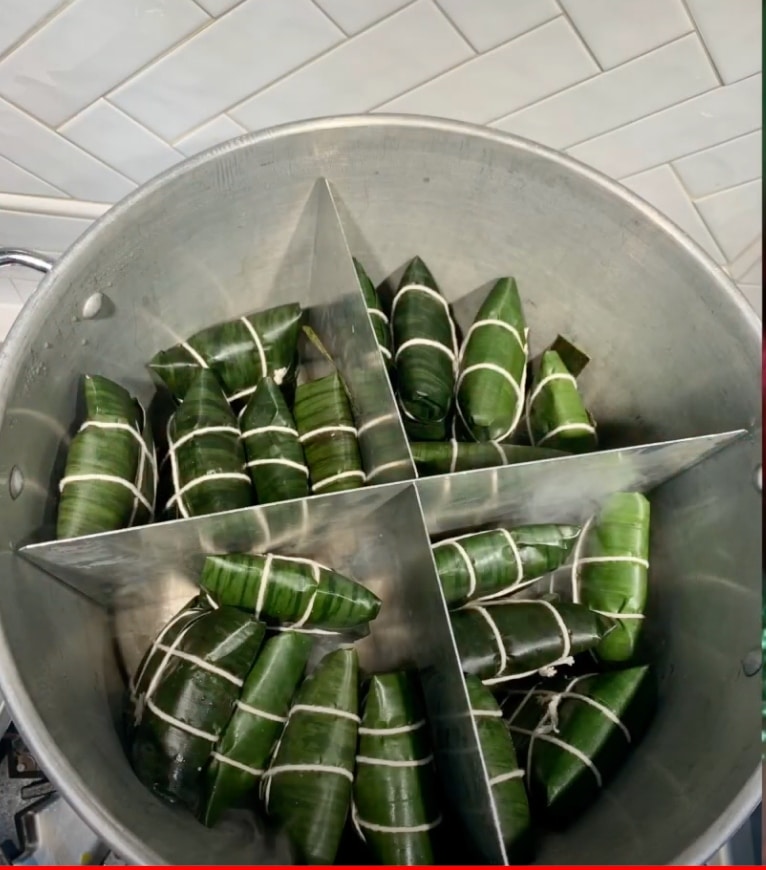
- DAY 2 — Boil Your Hallacas
- Gently place the hallacas, snugly fitting together, but not packed too tightly—or they won’t cook through. Add water to cover. Sprinkle 1 to 2 tsp or salt to the water. Layer one or two banana leaves at the top of the pot. Bring to a boil, lower the heat, cover with the lid and simmer for 1 hours.
Or, if you wish—although this is not traditional to Venezeula— you can steam your hallacas, as Liliana learned to do when she and her family lived in Mexico for many years. If you choose to steam: Fill a deep and large steamer pot (what they call in Mexico a tamalera, says Liliana) with about 1 to 2 cups of water at the bottom, so that it is at least 1 to 2 inches high. Add 1 to 2 tsp salt to the water. - Place a metal colander, small steamer, or a tin pie plate punctured with holes (to let the steam rise) inside the pot. Above it, line up your hallacas, in rows.
- Bring to a boil and immediately lower the heat to simmer.
- Whether you boil or steam, cover with the lid and let the pot gently steam for one hour. Check every so often to see if the water needs replenishing. After 1 hour, remove the hallacas from the pot. Lay them on a sheet tray or large pan where they can drain and rest for 1 hour, still wrapped and tied, before serving that day, or even better, on Day 3. (Meaning, start making your hallacas them 2 days before, Dec. 22 to serve Dec. 24).
- Everybody wants to eat them immediately, says Liliana, but it’s worth the wait—at least an hour and even better, overnight for serving the next day. The masa texture gets firmer and the filling settles into its depth of flavors. ”It is better to eat them after they rested for at least 1 hour, although they will be at their very best the next day, reheated, because the dough texture is completely done,” says Liliana.
- To reheat cold hallacas that have been refrigerated, fill a pot with enough water to cover the amount of hallacas you want to warm. Bring the water to a boil. Add the hallacas. Cover with the lid. Lower the heat and simmer, lid on, for 20 minutes.
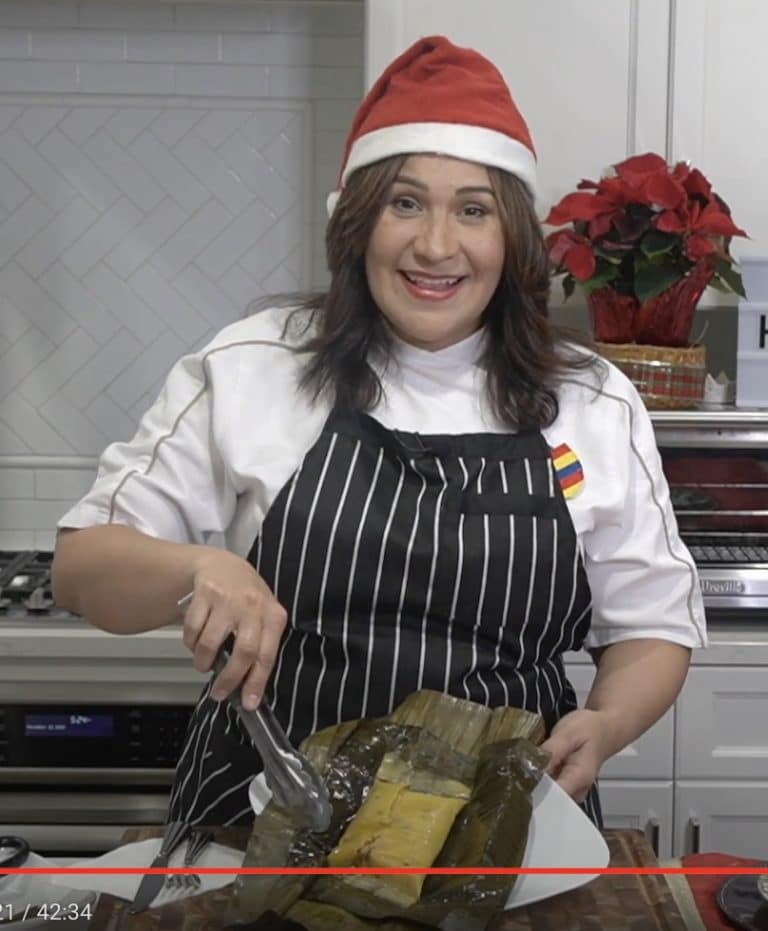
- Serve Your Hallacas! (P.S. Happy Holidays)
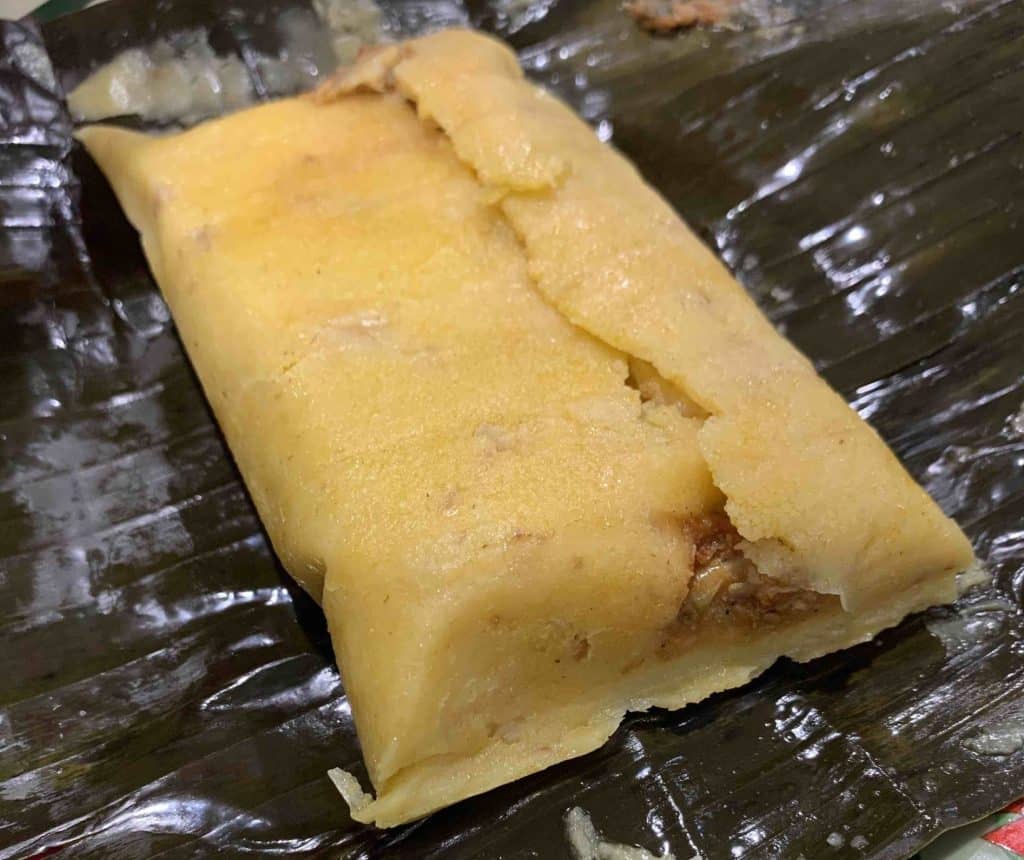
- When ready to serve, the cook first cuts and removes the hallacas’ string, called pabilo in Venezuela, revealing the stuffed-masa deliciousness within.
- Serve to guests on a pretty plate with a small, decorative leaf under it or no leaf at all. ¡Buen provecho and feliz navidad!
- Fresh hallacas will keep in your refrigerator for about 5 days. They also freeze beautifully and will keep up to 6 to 8 months. Liliana recommends always cooking hallacas before freezing


Notes
- For the poultry part of the guiso, Liliana prefers to boil a hen, a mature chicken old enough to lay eggs, for extra depth of flavor.
- This recipe uses a type of unrefined whole cane sugar that goes by many names across Latinx cooking. These include: papelón, piloncillo, panela or raspadura. It usually comes in the shape of a cone.
- If you make extra annatto oil—and we recommend you do, as it is used in so many Latinx dishes—store the extra in a glass jar in your fridge, where it will last for many months.
- You can find banana or plantain leaves in the frozen section of Latino or Asian grocery stores.
- If you use pork lard instead of shortening for the masa, you can skip the adding-in-bacon step, says Liliana. Shortening is flavorless, which is why Liliana mixes in the tocino.
- A muy importante cooking note! Venezuelans make hallacas while listening to their favorite holiday music, so turn up the tunes in your kitchen. Liliana also recommends dancing while cooking. Here is one of Liliana’s favorite playlists of Venezuelan Christmas gaitas for your hallaca-making merriment.
- The more hands you have, the faster hallaca making goes. Liliana recommends inviting muchos friends and family over for an hallaca-making party (while playing your favorite holiday music, of course! See note above about música.)
Like This


Got a question or suggestion?
Please rate this recipe and leave any tips, substitutions, or Qs you have!
Suggestions and questions from our readers
Great recipe!
We tried it last year and the hallacas turned out simply amazing. We are planning to make them again this year and will make this recipe our new family tradition.
Thank you Liliana!
Thank you very much Flavia!
Gracias for el comment tan lindo! Si quieres votar por Liliana’s Hallacas: https://familiakitchen.com/contests/your-familys-favorite-tamales/
Las mejores hallacas hechas por nuestra querida Lila, una venezolana que cocina con el corazón
Tan bella Carolina! Muchas gracias! Ahora ya todos saben el secreto de mis comidas jajajaj❤️❤️❤️
Gracias for el comment tan lindo! Si quieres votar por Liliana’s Hallacas: https://familiakitchen.com/contests/your-familys-favorite-tamales/
Las Mejores hallacas ufffff felicidades Liliana
Tan bella Carolina! Muchas gracias! Ahora ya todos saben el secreto de mis comidas jajajaj❤️❤️❤️
Muchas gracias Milagros! 🤩🤗🥰
Gracias for el comment tan lindo! Si quieres votar por Liliana’s Hallacas: https://familiakitchen.com/contests/your-familys-favorite-tamales/
This is the best Christmas dish ever and the recipe is very well explained. Thanks.
Gracias for el comment tan lindo! Si quieres votar por Liliana’s Hallacas: https://familiakitchen.com/contests/your-familys-favorite-tamales/
Muchas gracias Tiby!!! Thank you very much!
La mejor receta de hallacas venezolanas, súper deliciosas
Gracias for el comment tan lindo! Si quieres votar por Liliana’s Hallacas: https://familiakitchen.com/contests/your-familys-favorite-tamales/
Muchas gracias Rafael!!!
Deliciosas! Las amo y las amaré por siempre! Tus hallacas son las mejores!!!
Gracias for el comment tan lindo! Si quieres votar por Liliana’s Hallacas: https://familiakitchen.com/contests/your-familys-favorite-tamales/
Muchas gracias Sindy! Como siempre tan bella!
Always The Best👍
Felicidades Liliana. Your hallacas were voted No. 1 by the Familia Kitchen community!
Feliz Navidad and congratulations!